| Tower of the Dead B1F | |||||
|---|---|---|---|---|---|
| |||||
| Details | |||||
| Entry Item: |  Epaulet of the Dead | ||||
| Character Level: |
85 or above | ||||
| Duration: | 2hr | ||||
| Reward for completion: |
5000 Skill EXP 1700 Honor 2 Dungeon Points | ||||
| Penalty for failure: |
None specified | ||||
| Mob respawn time: | |||||
| Number of Participants: | None specified | ||||
| Daily Reward: | None specified | ||||
Introduction[ | ]
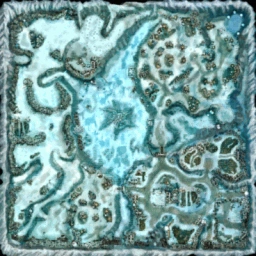
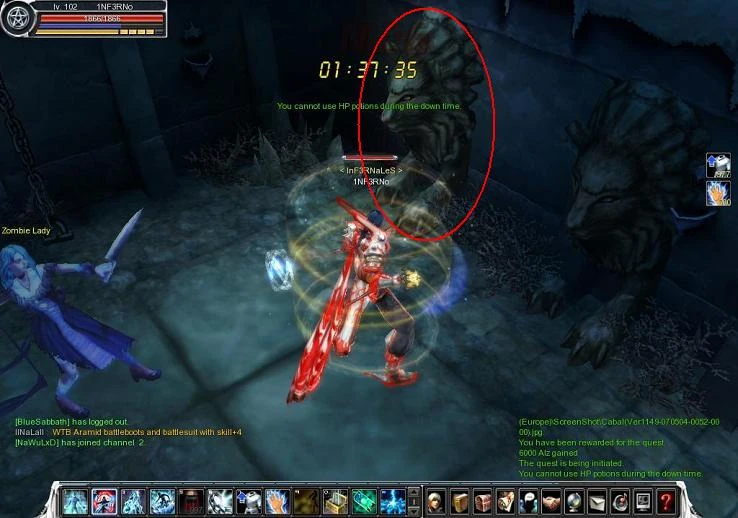
Also known as "EOD-B1F" is a level 85 dungeon, but is still difficult for players <100. It is a relatively long dungeon and a party of 1-3 people is recommended depending on how strong the party members are. You can begin to solo this dungeon ~110 depending on your strength.
Drops[ | ]
Some of the better items that can drop in this dungeon include:
- Craft Perfect Crafted Shadowtitanium and Osmium grade weapons and armor
- Weapon Lapis/Osmium
- Armor Shadow Titanium
- Core Force Core (Low), Force Core (Medium), Force Core (High), Upgrade Core (Low), Upgrade Core (Medium), Upgrade Core (High)
- Acessory Amulet of Resist +1, Defensive Earring +1, Defensive Earring +2
- Acessory Special Sealed Mergaheph's ring (drops only in this dungeon)
- Epaulet Titanium
- Bike Astral Bike (Blue), Astral Bike (RW3)
- Extender Slot Extender (Medium), Slot Extender (High)
- Board Astral Board Card - Zero Black, Astral Board Card - Zero Silver
- Material Sealed Core of Mergaheph (drops only in this dungeon)
For a summary of drops see: Tower of the Dead (B1F) Drops
A comprehensive drop table from EST is found at: Tower of the Dead (B1F) Drop Table
Dungeon Quests[ | ]
- The One who disturbs the Silence Reward 1,500 Alz
- Tinderbox of the Dead Reward 1,500 Alz
- The Werewolf's Room Reward 1,500 Alz
- The Dried Spring Reward 1,500 Alz
- The Dangerous Lamp Reward 1,500 Alz
- How to Go Through the Passage Reward 1,500 Alz
- The Bone Burning Brazier Reward 1,500 Alz
- The Blood Lusting Bat Reward 1,500 Alz
- The Gatherer of Souls Reward 1,500 Alz
- The Place Indicated by the Beads Reward 1,500 Alz
- The Room of Trial Reward 1,500 Alz
- The Dead General's Cloak Reward 1,500 Alz
- The Prisoner's Grudge Reward 100 Honour Points (Optional)
- What must be offered at a Tomb Reward 1,500 Alz (Optional)
- The Meaning of the Crest Reward 1,500 Alz
- The Pieced Together Being Reward 1,500 Alz
- The Mergaheph Reward 1,500 Alz
- The Second Trial Reward 1,500 Alz
Chests[ | ]
This dungeon has a total of 13 x Treasure Chests; 2 x Relic Chests; 2 x Treasure Chests and 1 x Legendary Chests
- After killing Agrya -> Treasure Chest
- After killing Werewolf -> Relic Chest
- After killing Anelion -> Treasure Chest
- After killing Vuischekra -> Treasure Chest
- After quest The Bone Burning Brazier -> Treasure Chest
- After killing Rettooth -> Treasure Chest
- After killing Libers Pertz von Zatellerean -> Legacy Chest
- After killing General Zombie -> Relic Chest
- After killing Frozen Warrior Zombie from Howling Statue room -> Treasure Chest (Optional)
- After killing Frozen Slayer Zombie -> Treasure Chest
- After killing Frozen Prime Knight Zombie -> Treasure Chest (Optional)
- After killing Flesh Golem -> Treasure Chest
- After killing Flesh Golem -> Treasure Chest
- After killing Flesh Golem -> Treasure Chest
- After killing Flesh Golem -> Treasure Chest (Optional)
- After killing Flesh Golem -> Treasure Chest (Optional)
- After killing The Mergaheph -> Legendary Chest
- After quest The Second Trial -> Legacy Chest
Monsters[ | ]
Bosses[ | ]
|


Video Walkthrough[ | ]
Tower of The Dead - B1F PART I
Tower of The Dead - B1F PART II
Tower of The Dead - B1F PART III
Step by Step Walkthrough[ | ]
Click [Collapse] to hide the walkthrough below.
| Image | Description |
|---|---|
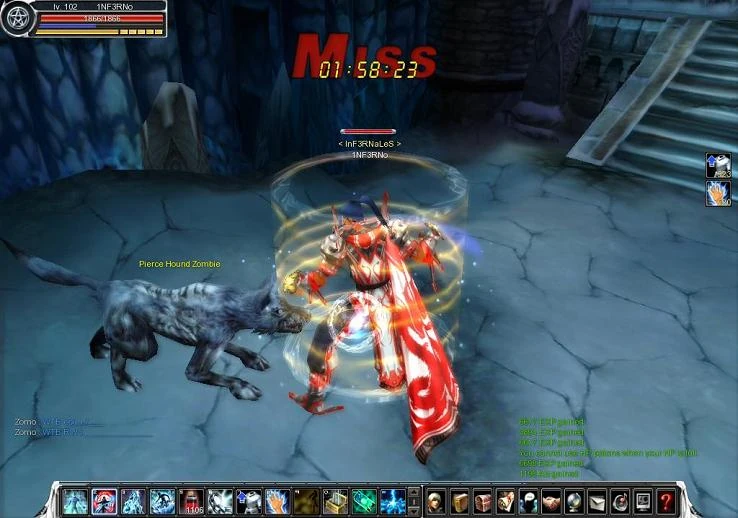 |
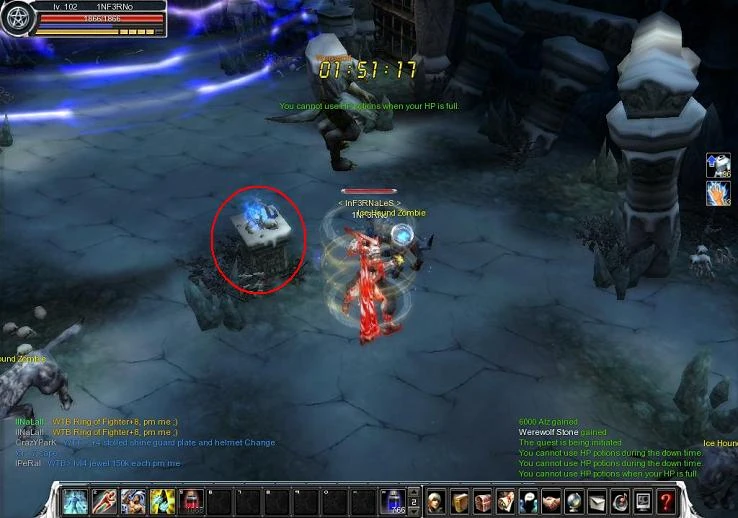
Once you enter, kill Pierce Hound Zombie to collect Blue Bead. |
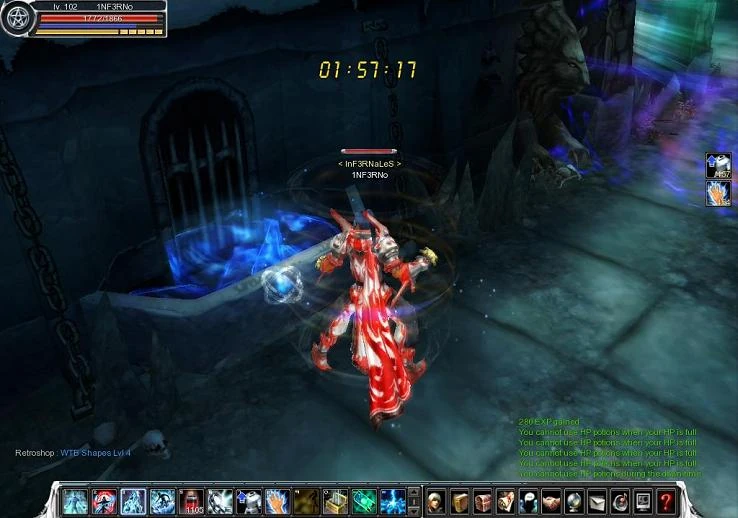 |
After killing it go forward to the spring, click it. |
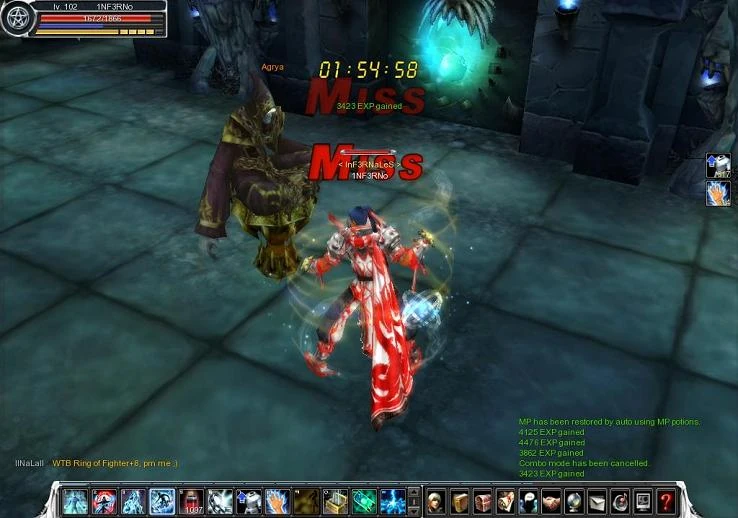 |
After clicking the spring, kill Ice Hound Zombie until you get an Ice Hound Zombie Cuspid. After you get it, go back to the spring and the barrier will open. Go forward and look for Agrya and defeat him, collect Black Bead. |
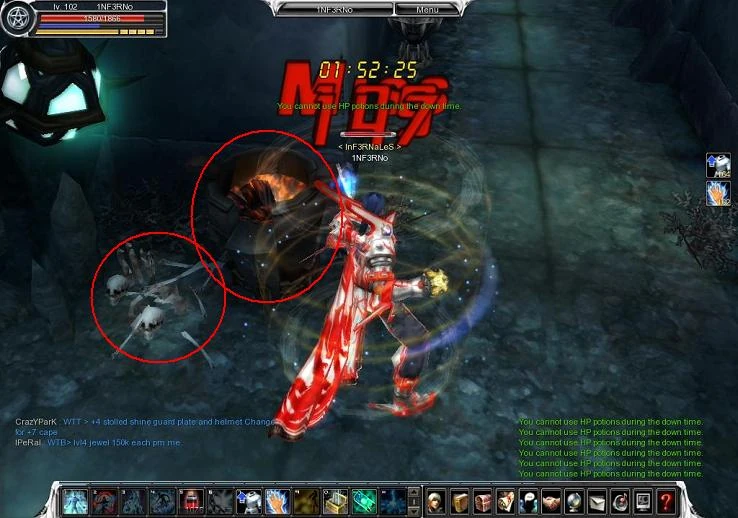 |
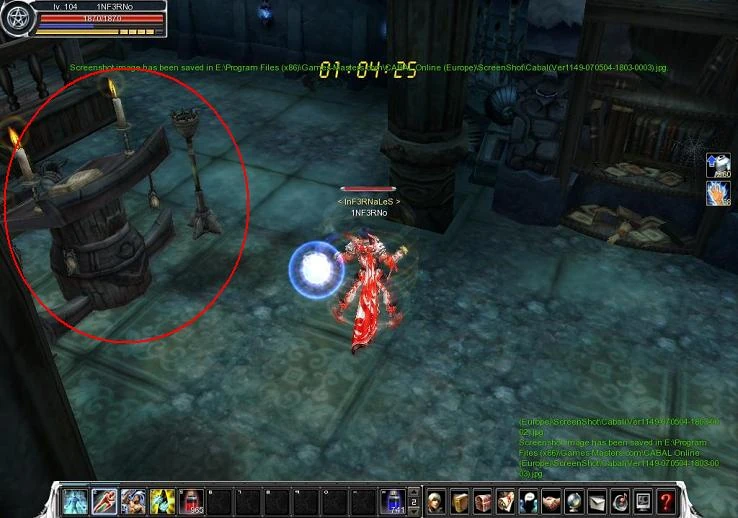
After, go back to the start of the dungeon until you find a brazier and some bones near it. Click the brazier, the bones, and then again the brazier. |
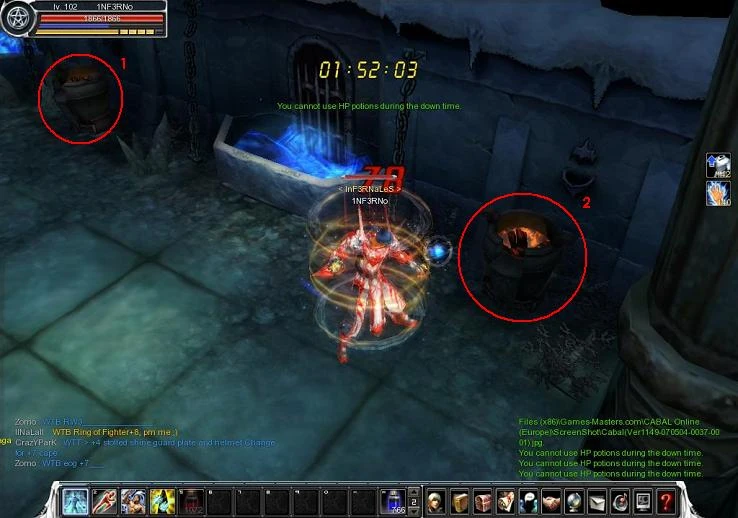 |
Advance and touch the brazier in the order that the image shows. |
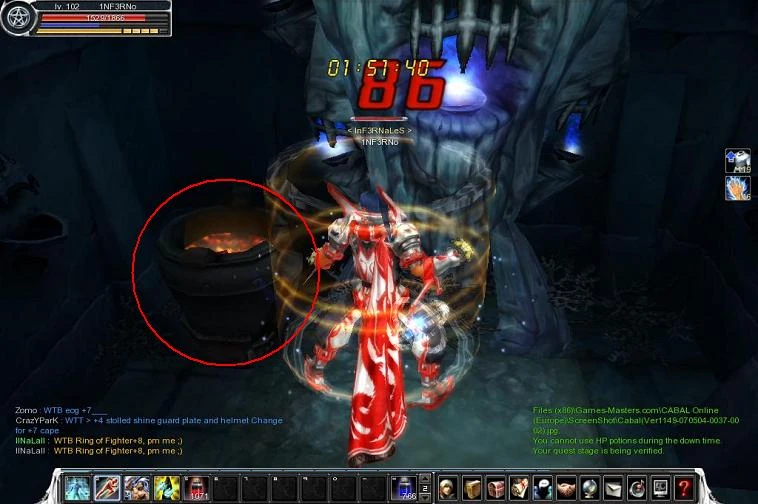 |
Go back to where you killed Agrya and get near the corner and touch the last brazier. |
 |
Turn around and touch the torch on the right. |
 |
After touching the door you'll enter the Werewolf's Room. |
 |
Once you enter touch the altar with the blue fire. |
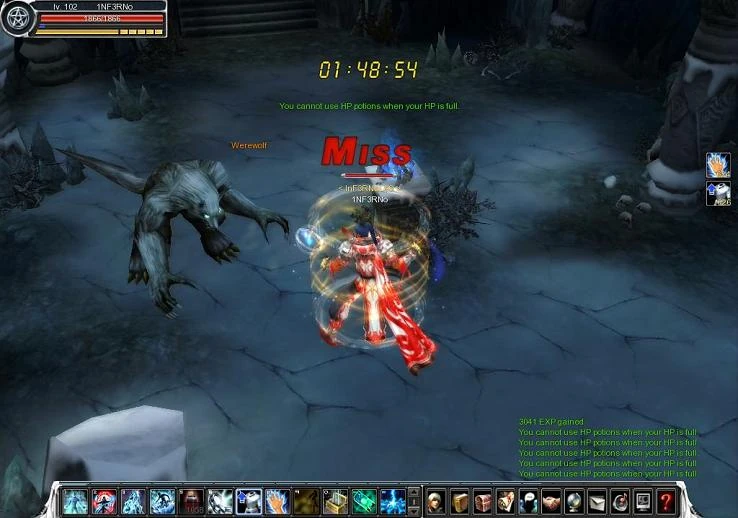 |
Now kill the Werewolf. After killing him, collect The Parchment of the Thaw and touch again the altar. Exit the room by the portal. |
 |
Go forward and click the spring at the end of the corridor. |
 |
Click the springs in the order shown in the image. |
 |
Go back to the first spring and click it, obtain the seed. |
 |
Return to the spring at the end of the corridor. Click it again, the door will open. |
 |
Click the broken lamp, then click the lamps in the correct order, as shown in the image. If you don't do it right, ghosts will spawn. |
 |
After completing the lamps in order, go forward and kill Anelion, click the lamp before killing her; this will close the barrier, don't forget your friends if you're in a party. |
 |
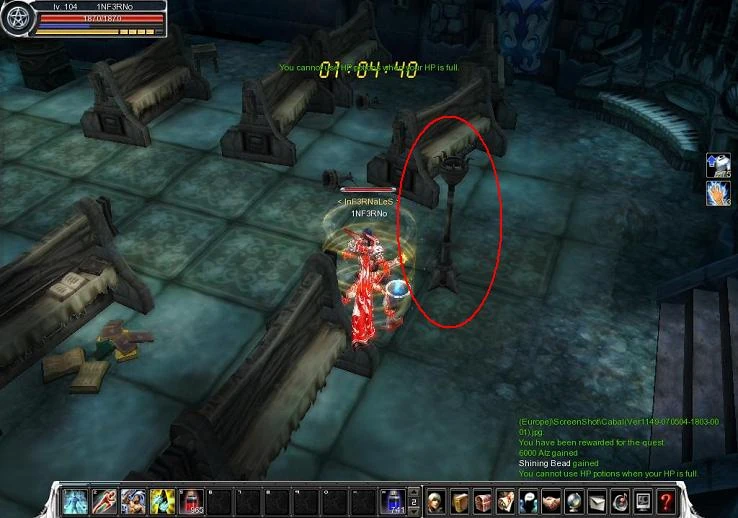
Now click the lion-head marked in the image. |
 |
Go forward and touch the broken lamp. |
 |
Once the door opens, kill one Ice Ghoul Warrior. |
 |
Now go back and touch the lamp that was near Anelion. |
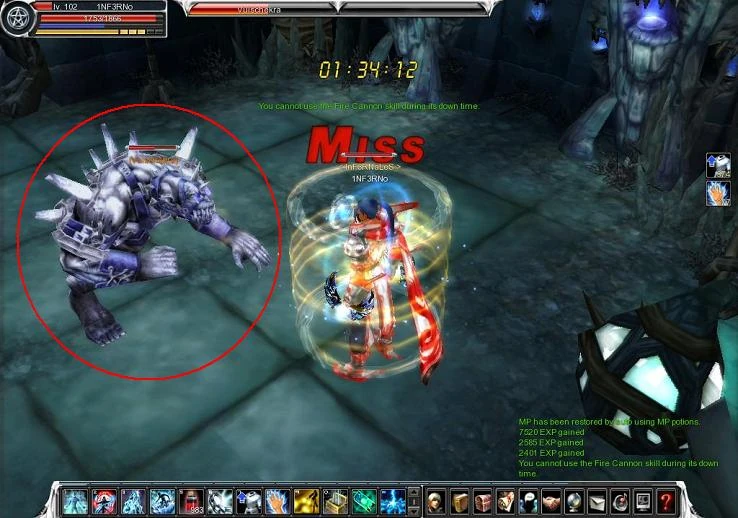 |
Go back to the Ice Ghoul Warriors and kill Vuischekra. |
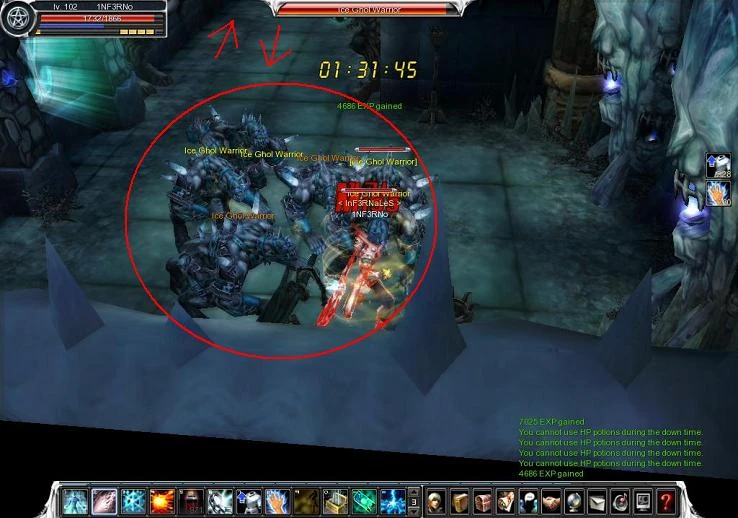 |
After killing him make sure you pull all the Ice Ghoul Warriors from the next corridor. This will come in handy later. |
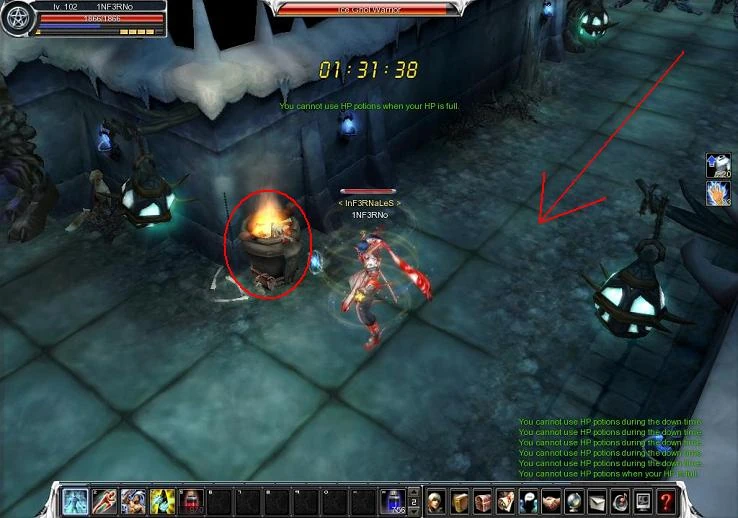 |
Enter the corridor using Dash and/or Blink and make the Ghouls stay back in the other chamber so they won't follow you, touch the brazier. The doors will close and you'll have to kill 20 Ice Ghouls. After that, touch the brazier again and the door will open. |
 |
Enter by the new way and touch the lion-head on the right and a door will open. Continue on your path there. |
 |
Be careful and break the chest, the door will close. If your friends are outside they can't help you right now until the door's broken. |
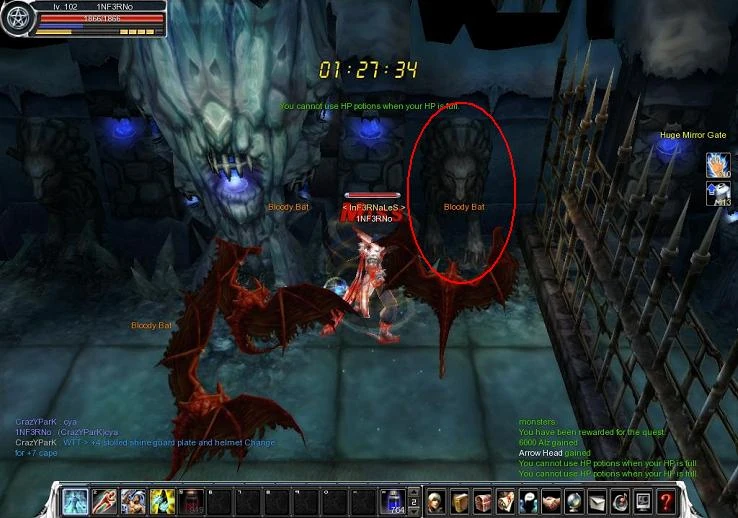
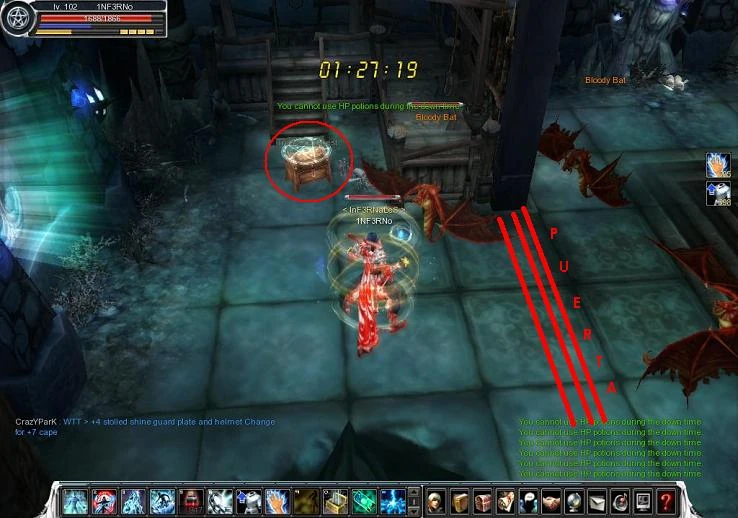
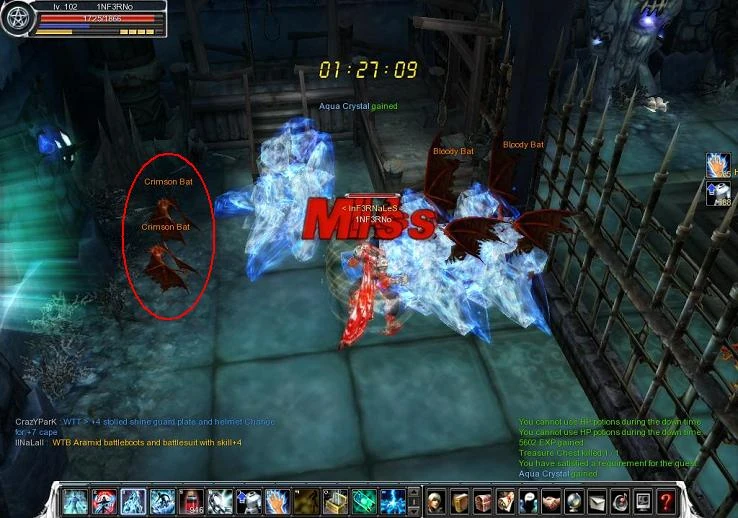 |
Kill both Crimson Bats to spawn the next boss Retooth. Then break the gate. |
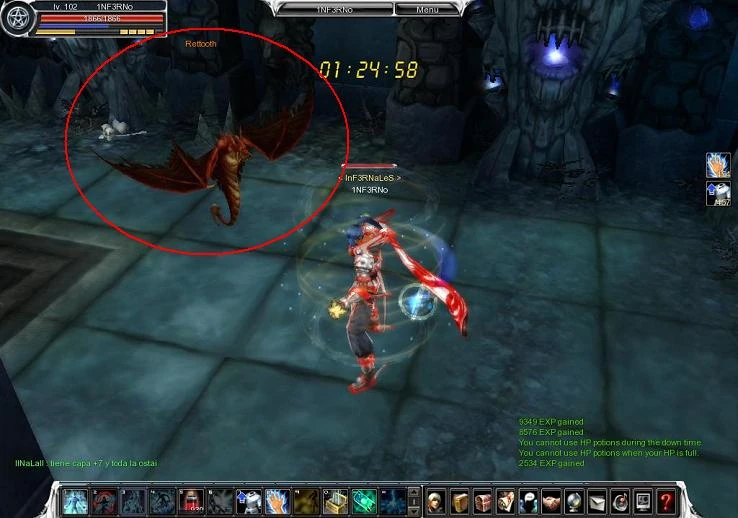 |
Go forward and kill Rettooth. |
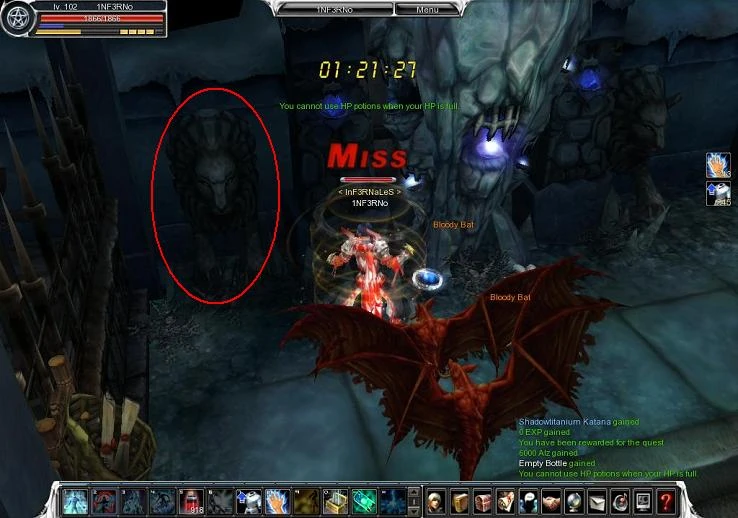 |
Now go and touch the lion-head on the left |
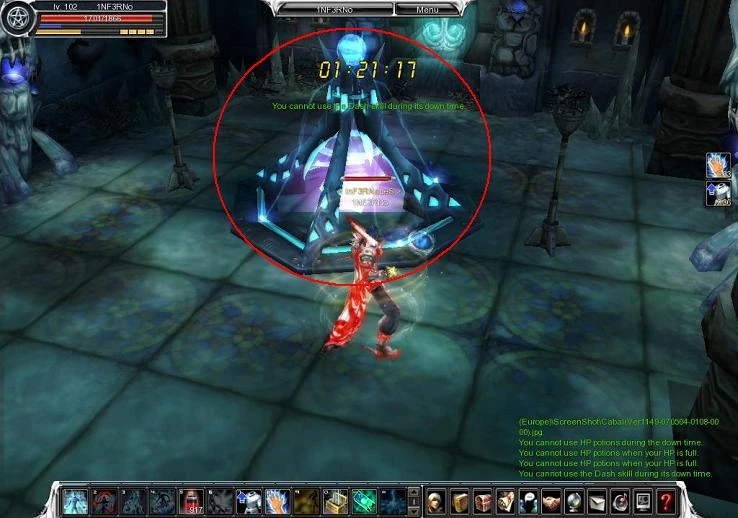 |
Go forward and touch the object shown in the image. |
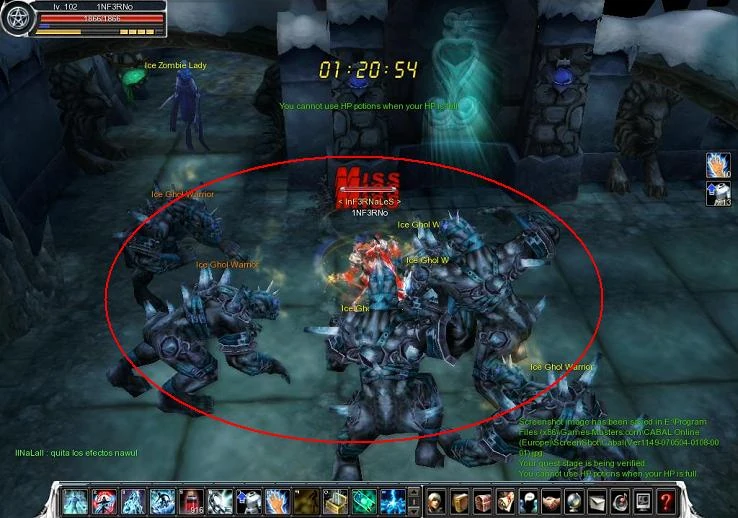 |
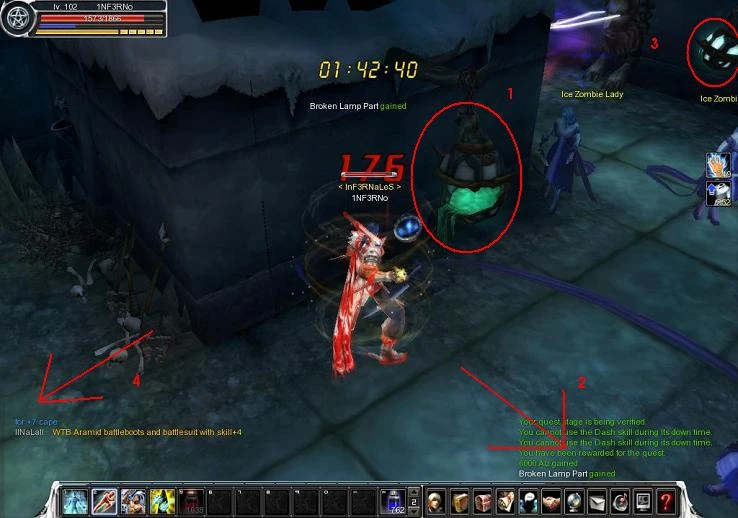
Kill the Ice Ghoul Warriors until you find the quest item. Now you'll have kill the monsters until they drop the quest items, if you don't have enough ghouls, you'll have to wait 20 minutes until they respawn. This is where it comes in handy that you lured the ghouls out of the corridor earlier. |
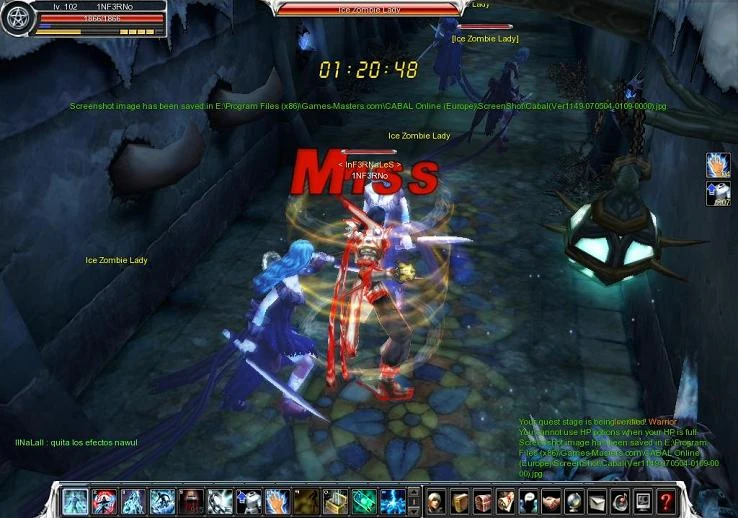 |
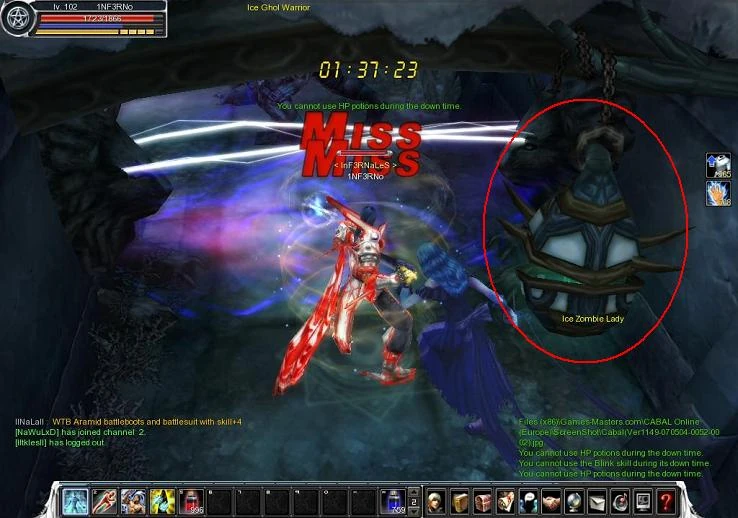
Kill Ice Zombie Lady until you find the quest item. |
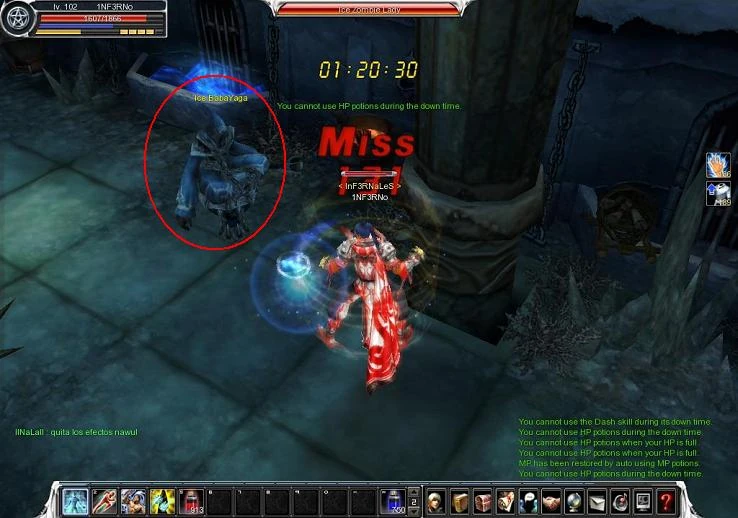 |
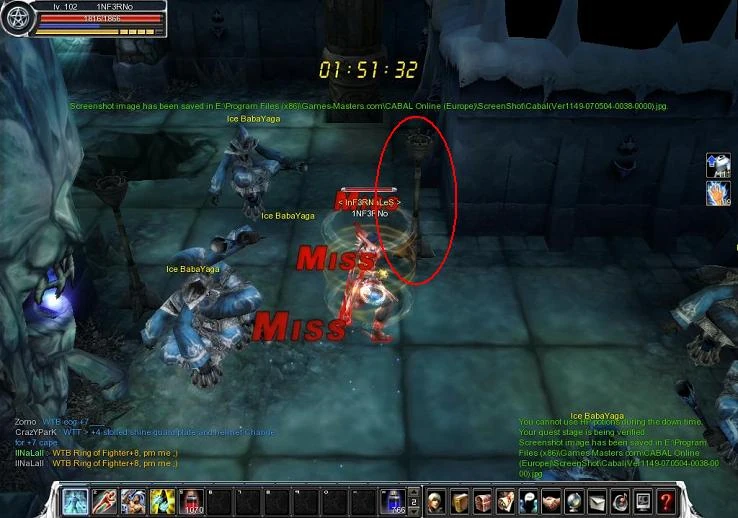
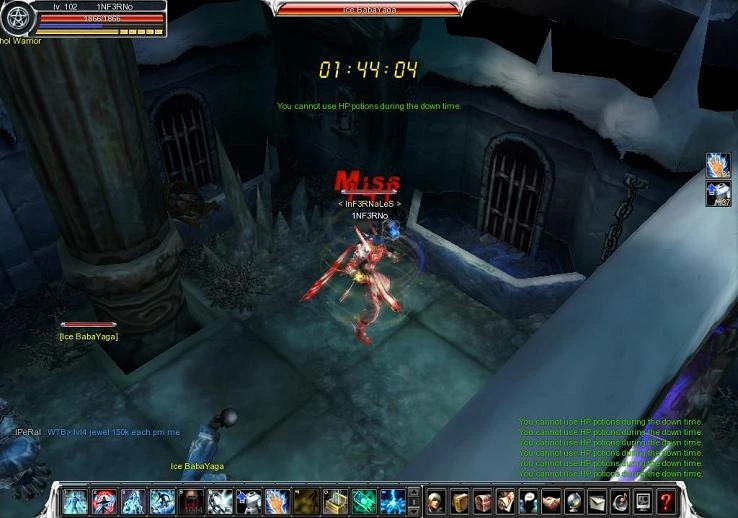
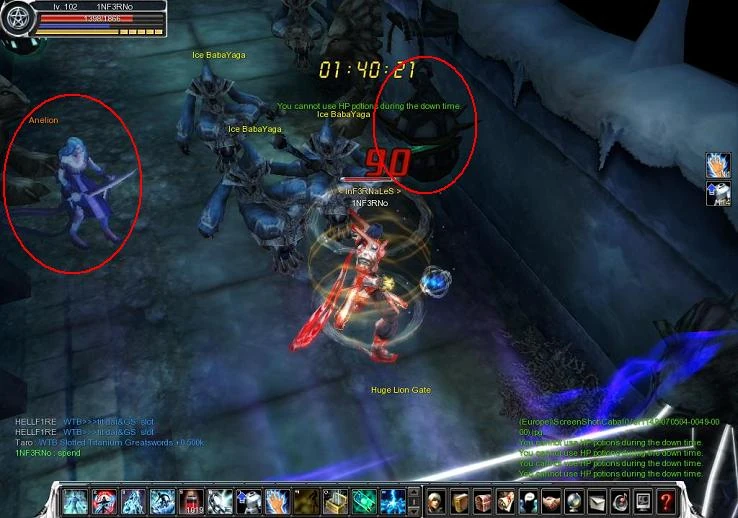
Now it's time to kill the Ice BabaYagas until you find the quest item. |
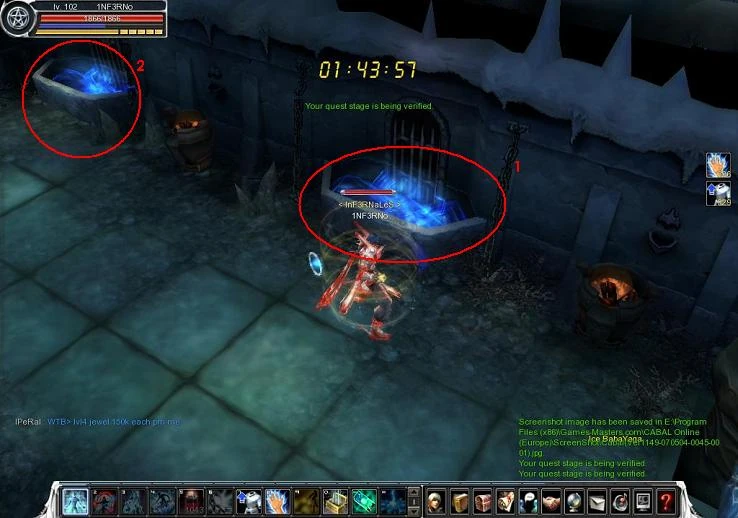
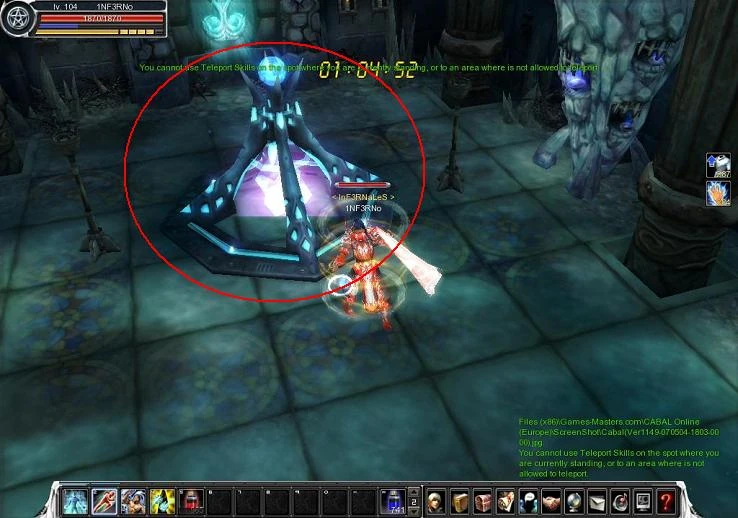 |
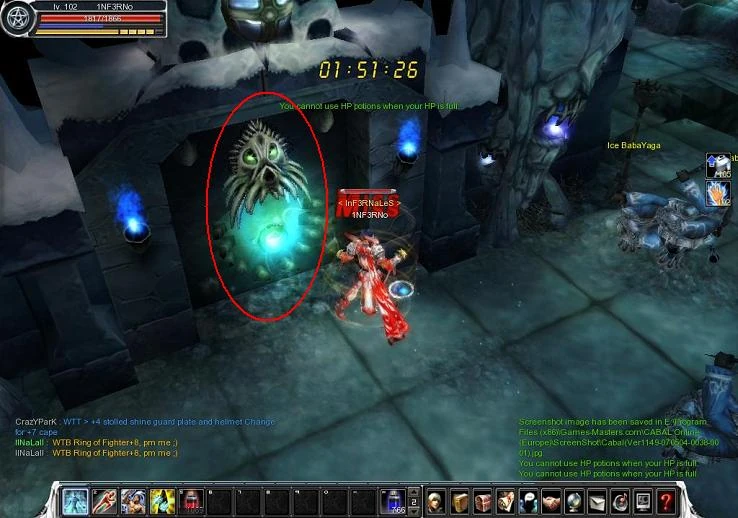
After collecting all the required quest items, return to the object and click it. You will be teleported to the Vampire Chamber. |
 |
Once you enter the room touch the torch, and go forward. |
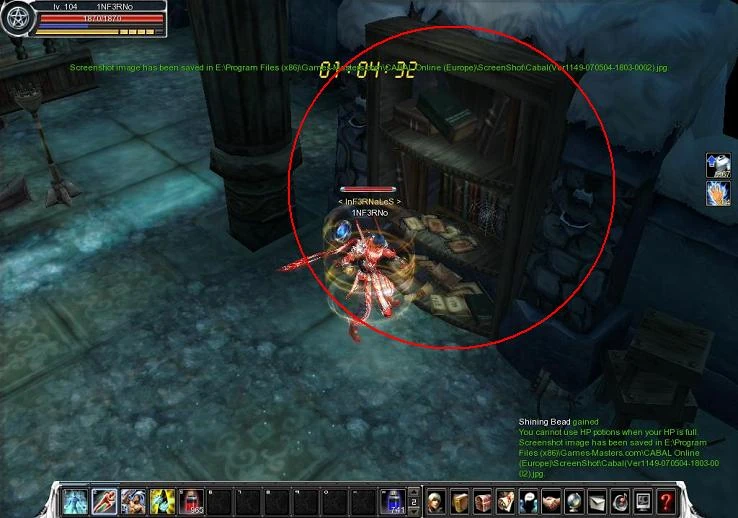 |
Then touch the bookcase on the right side. Make sure all your party members are near you when you do, since a wall will appear to lock you in the room. |
 |
Now touch the altar and the boss will appear. |
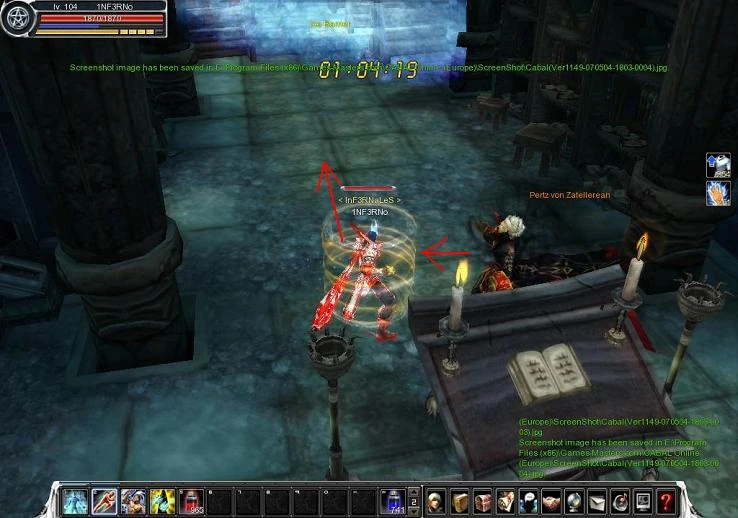 |
Once Pertz von Zatellerean appears, kill him. Before you completely kill him, make sure you read the next step, it will save you alot of time. |
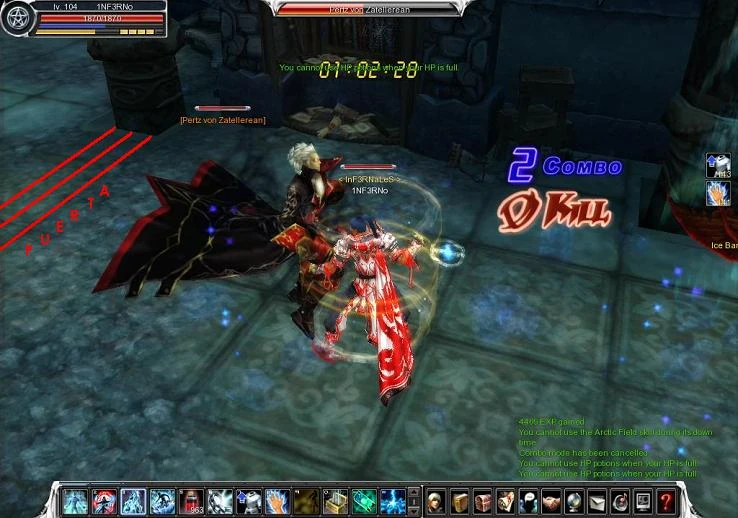 |
Drag Pertz von Zaterellean where the image indicates, after killing him an ice wall will appear as the image shows. Make sure all your party members are on the correct side of the wall. When you kill the boss you'll have to kill him again. |
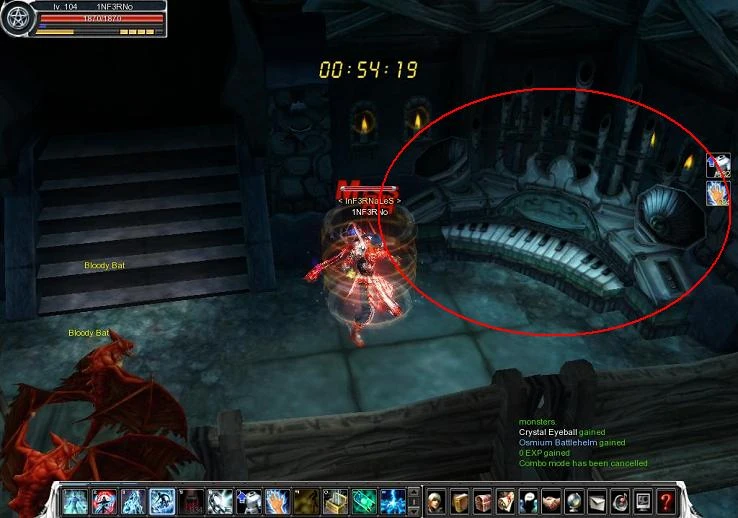 |
After killing the boss two times, go back to the place you came in and touch the piano. |
| File:B1F 40.jpg | Then go forward and touch the portal to leave the room. |
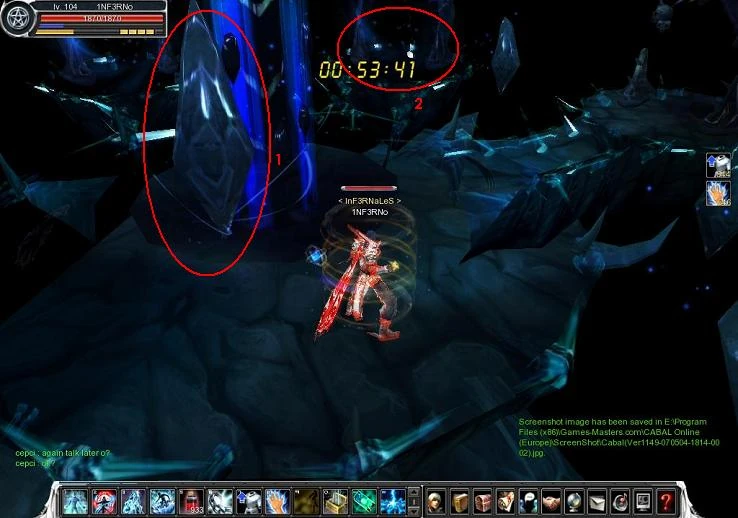 |
Touch the stone in the center and after that go through the center portal that the image indicates. |
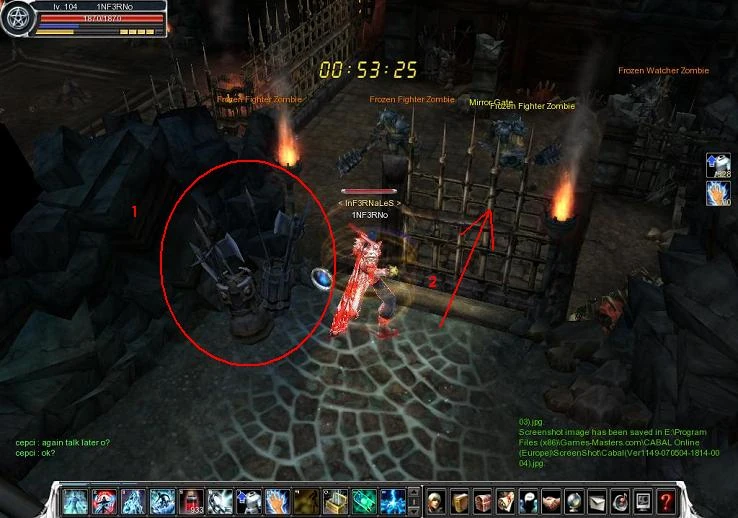 |
Now you'll appear in a chamber, you'll have to touch the item marked on the left side in the image. |
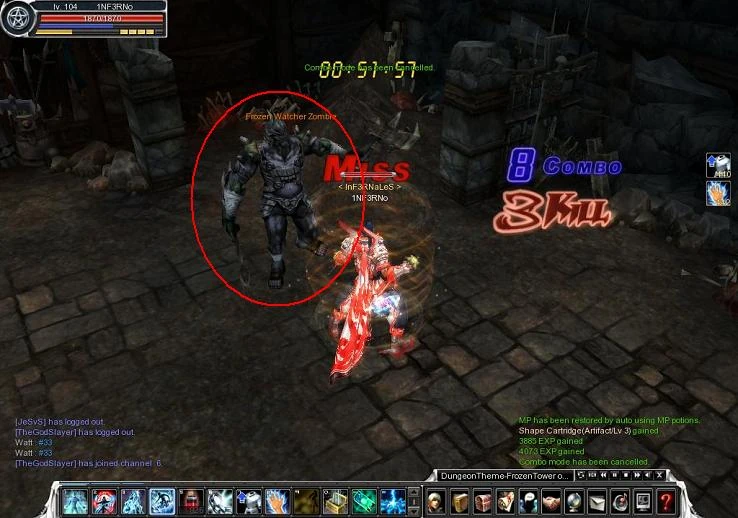 |
Continue forward and you'll have to kill the Frozen Watcher Zombie. |
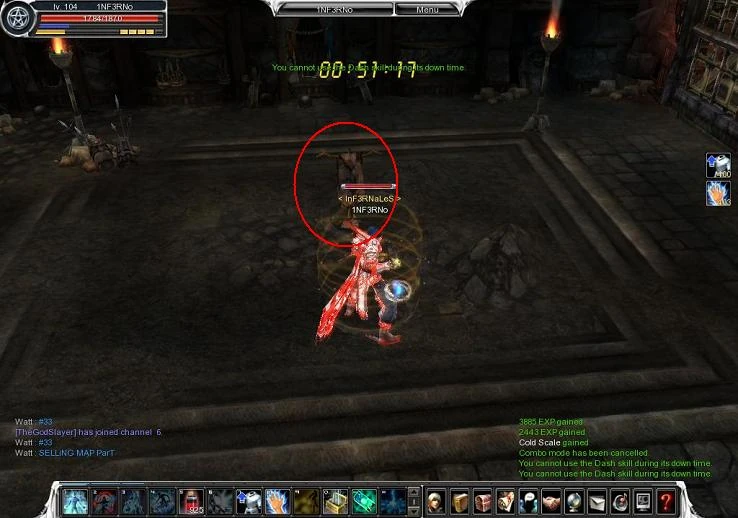 |
After killing the mobs in that room, the gate will open and you'll be in a square chamber with a pedestal in the center. |
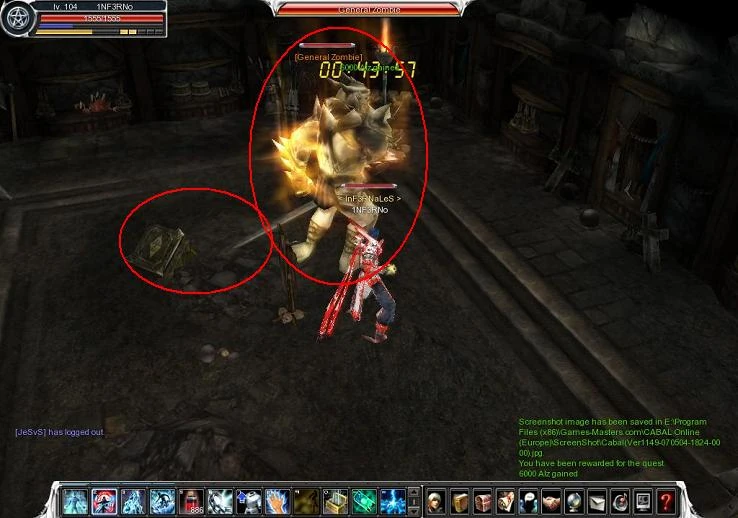 |
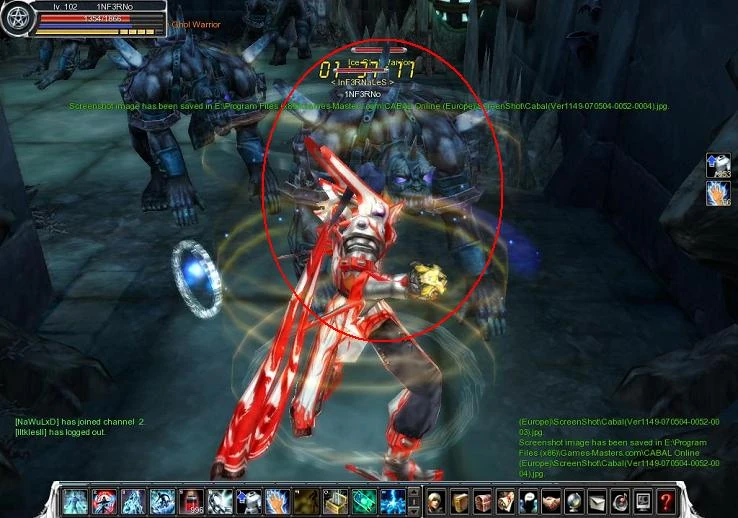
Once you touch it, three "watcher" zombies will appear. Here you have a choice to make: Farmers/Tough Guys: - Nuke everything in sight, but don't kill the Captain Crush Zombie. The other mobs should just keep respawning. In a Hurry/Low Level Players: a. Lead the three monsters into a corner, and dash away... leaving them there. b. Destroy the gate preventing your escape. c. Lead the Warax Watcher Zombie and the Warhammer Watcher Zombie up the stairs, and out of your way. d. Dash away, back down to the pedestal, leaving them stranded atop the stairs. e. Kill the Crush Watcher Zombie. This will cause three Crush Zombies to spawn. f. After killing each one at least once, you should get the Captain Crush Zombie to spawn. g. Once you kill the Captain, touch the central item again and the General Zombie will appear, kill him. |
 |
Once you have killed the boss, touch the pedestal again and a new path will open, continue on the new path. Now you get the chance to do the secondary quest that gives you 6,000 Alz. You can skip it if you are low on time. |
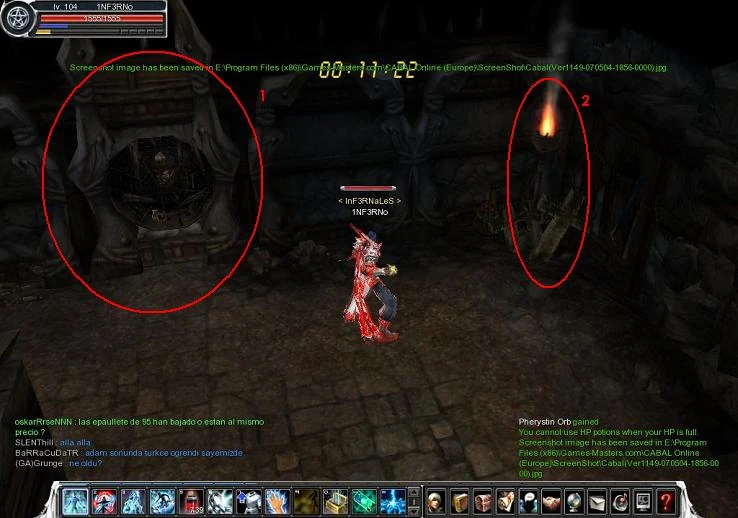 |
'Secondary Quest - (Reward - 6,000 Alz) Touch the chunk of wall indicated in the image, then touch the torch on the right side of the wall. |
 |
Go forward in the corridor to the next chamber and touch the torches in that room, and finally the wall indicated in the image. Some Frozen Stone Golems will appear. |
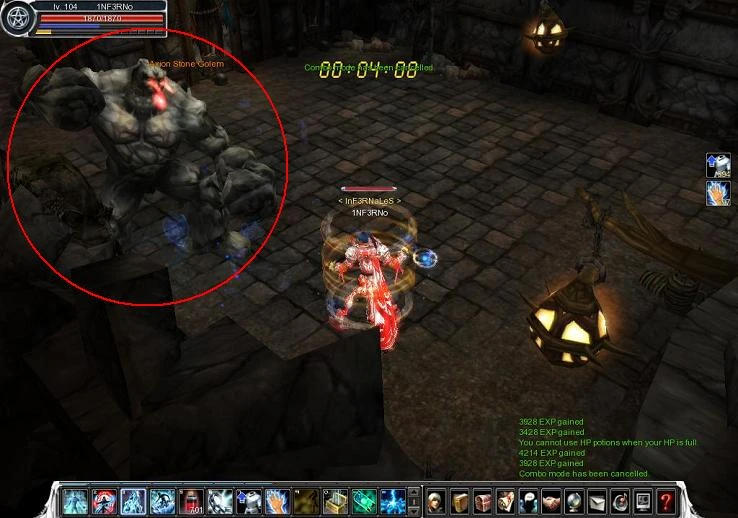 |
Once you kill all of the golems, Axion Stone Golem will appear. Once you eliminate the Golem, he drops the item that will activate the actual secondary quest. Go back to where you activated the quest and touch the wall again. |
 |
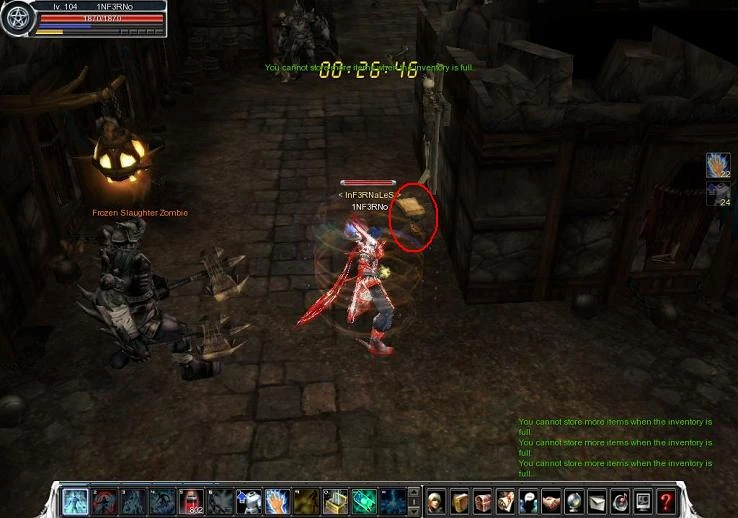
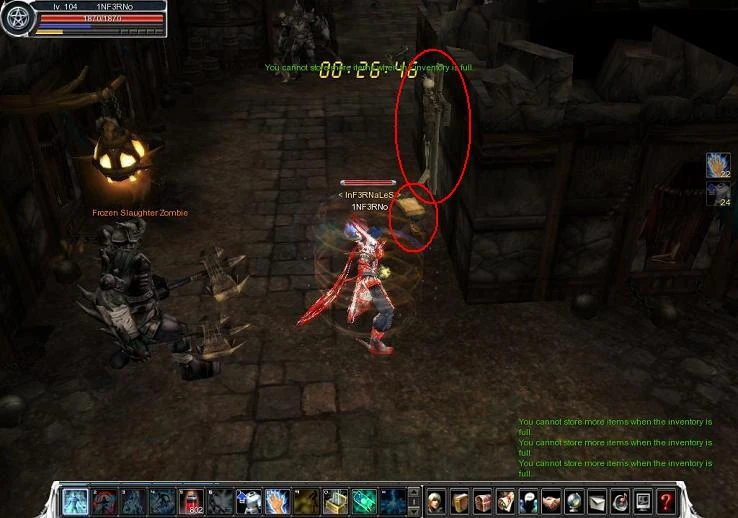
Continue forward and kill the Frozen Warrior Zombie, he isn't important for any quests in the dungeon, but he drops a chest. |
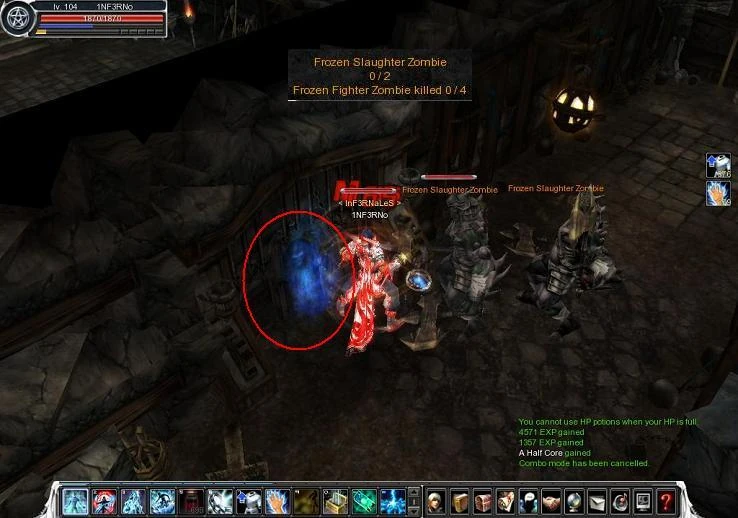 |
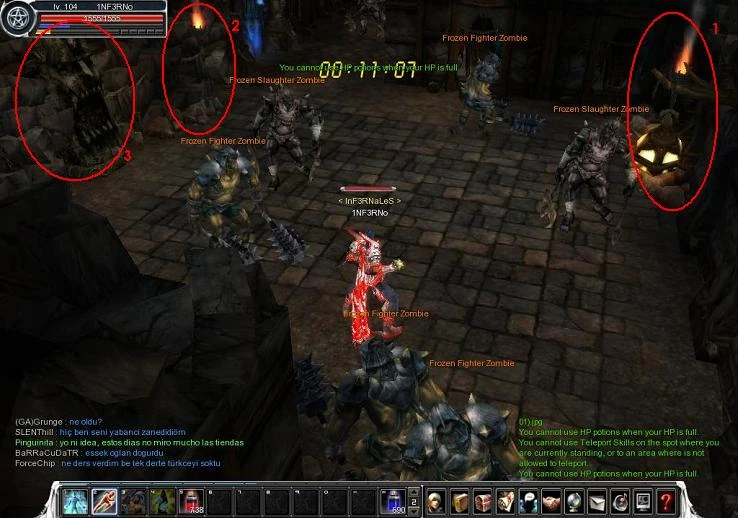
Touch the tomb near you. When you touch it, it'll ask you to kill 2 Frozen Slaughter Zombies and 4 Frozen Fighter Zombies. After you kill all the required monsters, go back to the previous tomb and touch it to complete the quest. Secondary Quest Finished! |
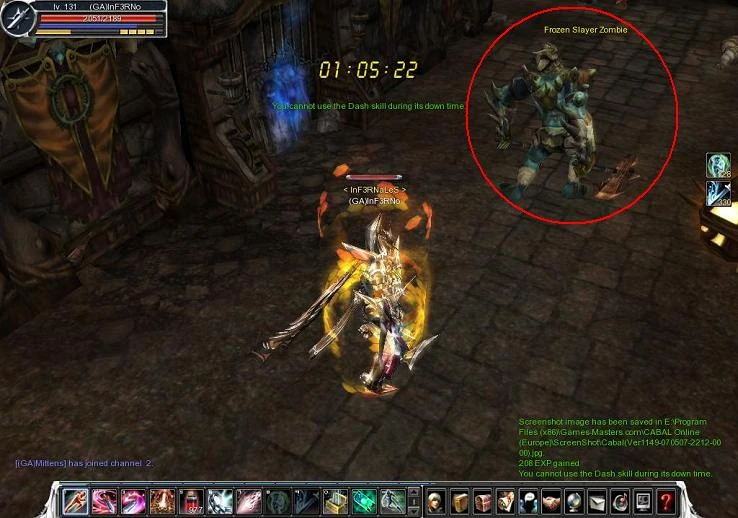 |
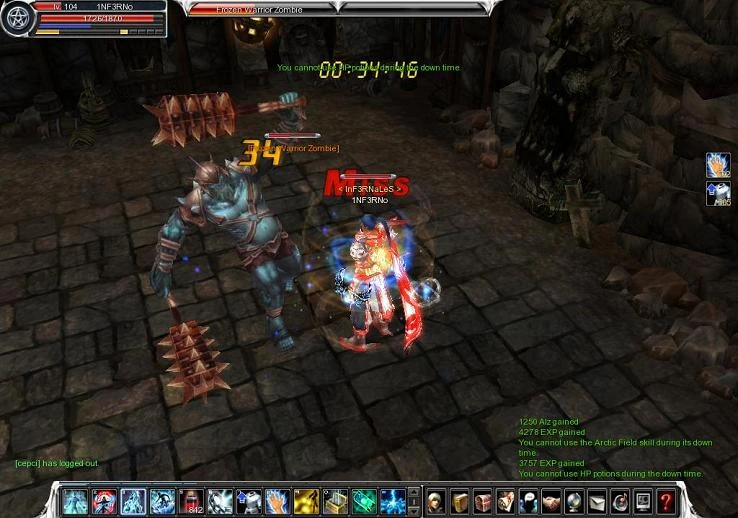
If you didn't kill him before, go forward and kill the Frozen Slayer Zombie. |
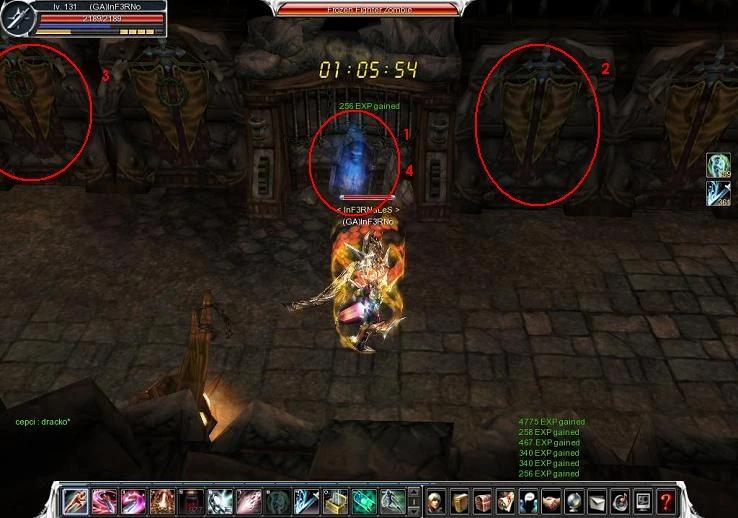 |
After killing him, touch the items in the order that the image indicates. |
 |
After the gate opens, touch the books near the skeleton at the cross. This will open a gate further ahead. |
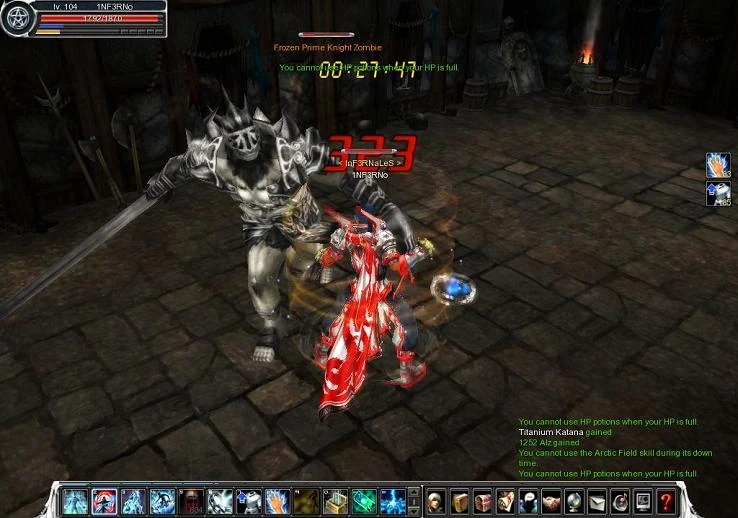 |
Continue forward and you will find to the Frozen Prime Knight Zombie. Kill him for a chest, he is not needed for a quest. |
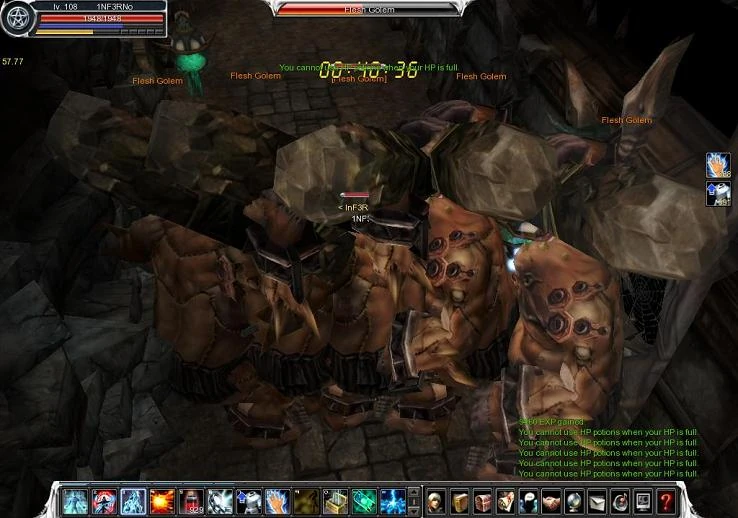 |
Go forward in the corridor and you'll have to kill 3 Flesh Golems. |
 |
After killing them go back a bit and you'll have to touch the crucified skeleton. You can go back to the corridor and kill the rest of the Flesh Golems, as they make additional chests appear. |
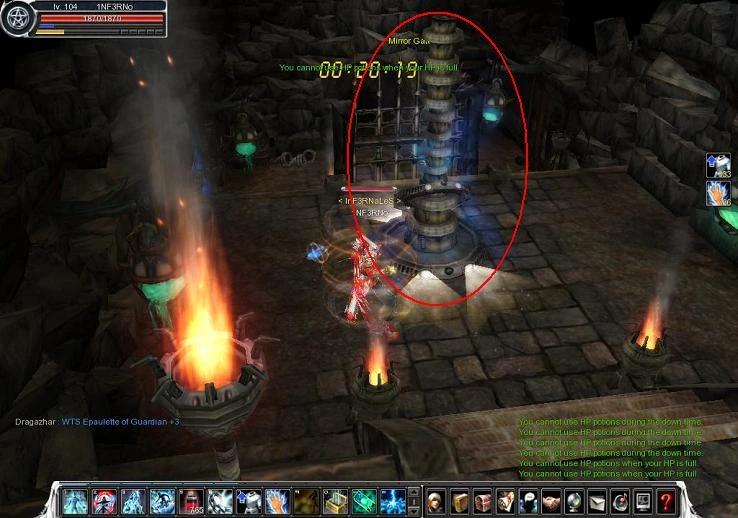 |
Now go forward through the corridor and teleport to a new zone by touching the excavator. |
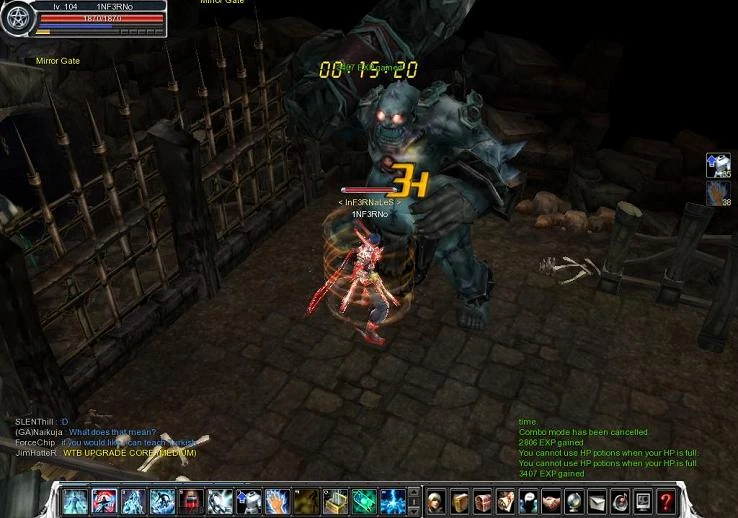 |
Go forward through the final corridor and kill the final boss, The Mergaheph. |
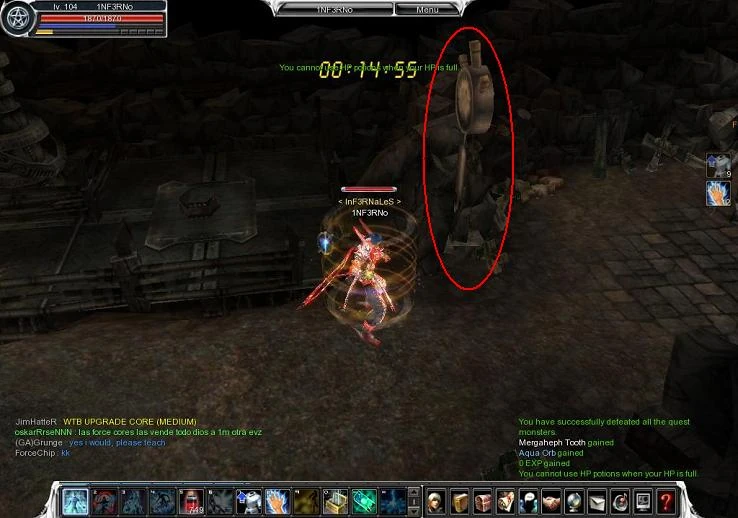 |
After killing Mergaheph go back a bit and and touch the clock marked in the image. |
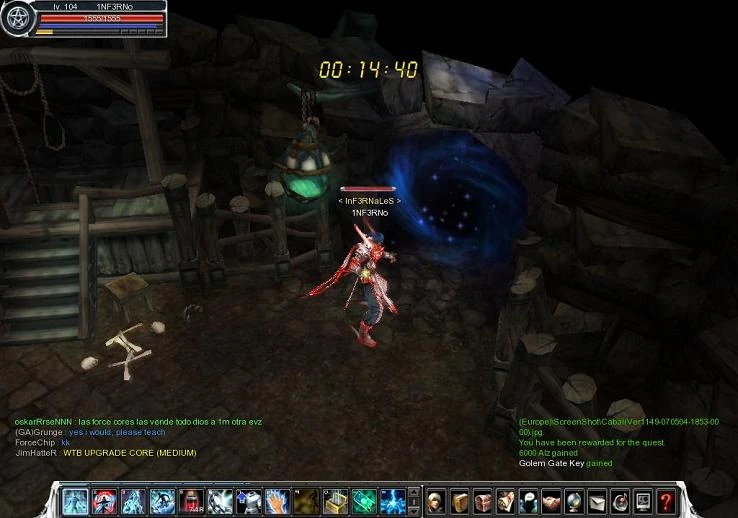 |
Go back where you killed the final boss and move through the portal. |
 |
You'll be in a chamber with a giant stone and three portals. Touch the giant stone in the middle and go through the most right portal which is marked in the image. You'll now be teleported back. Now touch the tomb, a chest will appear, break it and you've finished the Tower of the Dead (B1F) and you'll be gifted with 5000 Skill EXP and 170 Honour Points. |
| Mission Dungeon | Lake in Dusk (W) • Ruina Station (W) • Tower of the Dead (B1F) (W) • Volcanic Citadel • Tower of the Dead (B2F) • Forgotten Temple (B1F) • Forgotten Temple (B2F) (A) • Forbidden Island (A) • Illusion Castle Underworld • Illusion Castle Radiant Hall • Holy WindMill • Altar of Siena (B1F) • Altar of Siena (B2F) • Maquinas Outpost • Holy Keldrasil • Tower of the Undead (B3F) • Flame Dimension • Abandoned City • Legend Arena • Devil's Tower • Glacies Inferna • Edge of Phantom • Forgotten Temple B3F • Acheron Arena • Devi's Tower (Part2) • Pandemonium • Flame Nest • Ancient Tomb • Frozen Canyon • Mirage Island (A) • Labyrinth |
| DX Dungeon | Panic Cave (A) • Steamer Crazy • Catacomb Frost • Lava Hellfire • Hazardous Valley |
| Chaos Arena | Chaos Arena Lv. 1 • Chaos Arena Lv. 2 • Chaos Arena Lv. 3 • Chaos Arena Lv. 4 • Chaos Arena Lv. 5 • Chaos Arena Lv. 6 • Chaos Arena Lv. 7 • Eternal Chaos Arena |
| Related links | Dungeon Entry Items |